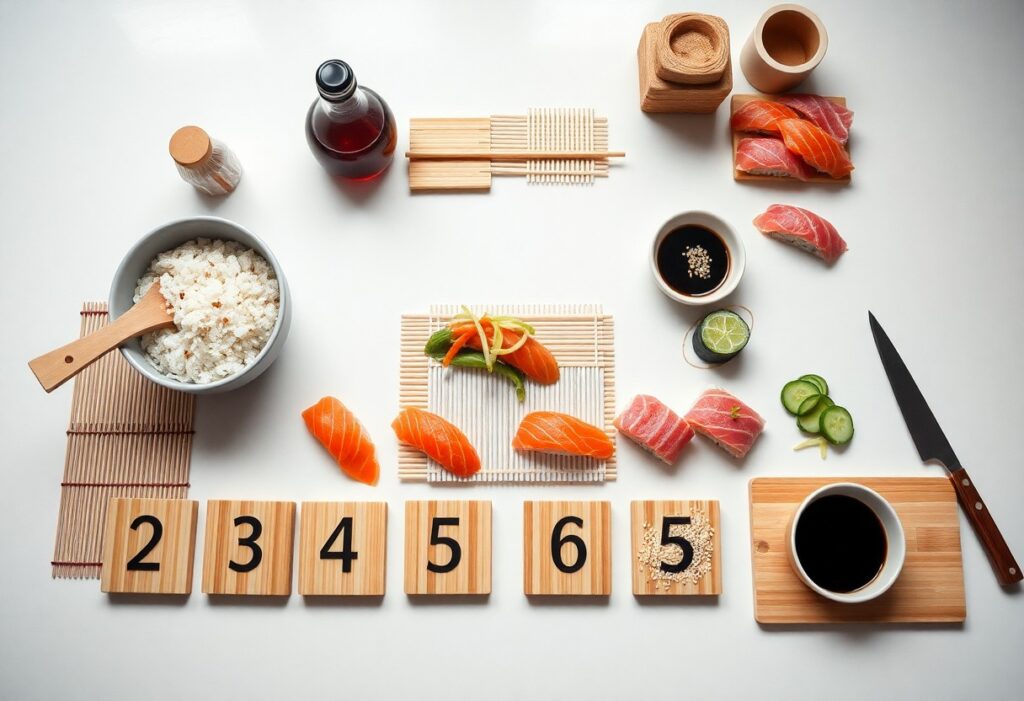
In this guide, you’ll learn how to make perfect sushi at home in 10 clear steps; pay attention to fresh ingredients, minimize raw fish risks and enjoy safe, easy enjoyment.
Key findings:
- Perfect sushi rice is crucial: wash properly, cook in the right proportions and season with sushi vinegar.
- Fresh ingredients and sharp knives ensure the best texture and taste; Carefully prepare nori, fish and vegetables.
- Simply practice: even rolling, portioning and variations (maki, nigiri) quickly lead to consistently good results.
Buy the right ingredients
When shopping, look for fresh ingredients: sashimi-quality fish, nori leaves, high-quality sushi rice, rice vinegar, soy sauce, wasabi and a bamboo mat. Buy from trusted retailers and find out in advance: Make your own sushi | Recipe – Migusto. Pay special attention to the expiration date and the cold chain.
Fresh fish and vegetables
Choose sashimi-quality fish with a neutral smell and firm texture. Buy vegetables fresh, crisp and wash them thoroughly. Be aware of the risk of food poisoning with raw fish: Store it cold throughout and consume it on the same day.
High-quality sushi rice
Use short-grain sushi rice for the perfect stickiness. Wash the rice thoroughly, cook it evenly, and season it with rice vinegar, sugar, and salt to keep your rolls last and taste good.
Rinse the rice until the water runs clear, use a rice cooker or heavy pot and let it rest briefly. Gently mix in vinegar and refrigerate the rice to room temperature; this is how you achieve the ideal consistency.
Wash the rice thoroughly
Before you start cooking, you need to wash the rice thoroughly to remove dirt and excess starch . Put the rice in a bowl, fill with cold water and stir gently with your hand until cloudy water is formed.
Avoid soap or hot water, as both affect the taste and can cause contamination. Repeat the rinse until the water color becomes much clearer.
Rinse off starch completely
Stir the rice gently so that you don’t crush the surface; so the starch dissolves better. Rinsing provides the typical, slightly sticky consistency of sushi rice.
Remove the superficial starch completely, otherwise the rice will become too sticky and mushy as it cooks. Use clean, cold water and change it several times.
Wait for clear water
You should keep rinsing until the water runs clear; this is the sign that most of the starch has been removed. Water clarity is crucial for the proper texture of the rice.
As a rule of thumb, 3-5 rinse cycles is often sufficient, sometimes more for very starchy rice. After the last drain, let the rice sit in a colander for a short time so that excess water drips off before soaking or cooking it.
Add the vinegar mixture
After the rice is cooked, add the vinegar mixture evenly and use a flat wooden spatula. Work quickly so that the rice takes on the seasoning without overcooking.
Gently fold the mixture into the rice; Do not beat it, otherwise it will become mushy. Feel and adjust the seasoning, because too much vinegar will mask the fine flavors.
Carefully fold in the mixture
Use the spatula to make even, gentle folding movements from the outside to the inside so that the grains remain separate and the vinegar layer is distributed. The goal is a shiny, airy texture.
Avoid stirring or pounding vigorously; Overmixing destroys the structure and makes the rice sticky. Work in calm, controlled moves.
Let the rice cool slowly
Spread the rice flat in a bowl or wooden box and fan it out with a fan or hand fan to cool evenly. Rapid cooling preserves shine and stickiness.
Do not leave the rice unrefrigerated for more than two hours to minimize the risk of bacterial contamination. Pay attention to hygiene when cooling.
Cover the rice loosely with a damp cloth to prevent it from drying out, but avoid airtight sealing while cooling; this way you keep the right moisture and consistency.
Cut the ingredients into strips
Before you begin, make sure you have a clean cutting board and a well-sharpened sharp knife. Cut in even strokes so that fills and texture are in harmony. Pay special attention to cut protection and hygiene to avoid contamination.
Cut the fish evenly
Choose sashimi quality and leave the fish well chilled. Cut against the grain into even, thin slices for tender bites. To be on the safe side, you should watch out for the risk of parasites with raw fish and use frozen goods if necessary.
Vegetables cut into fine sticks
Peel and remove hard cores, then cut into even julienne sticks. Use a stable cutting angle and keep the vegetables curled up with your fingers to avoid cuts . Look for crisp freshness.
For extra crunchiness, place the pencils briefly in ice water, then pat dry well. Store them airtight in the refrigerator and avoid leaving them for long periods of time to prevent bacterial growth and loss of flavor.
Preparing the bamboo mat
Before you begin, check the bamboo mat for loose struts and remove any residue. Dry them well, because wetness promotes mold. Position the mat so that the swabs are transverse to the cut; this gives you more control and improved rolling stability. Cleanliness is crucial, clean the mat regularly.
Wrap the mat with foil
Wrap the mat tightly with cling film so that the surface remains smooth and the rice does not stick. This protects the bamboo fibers and makes cleaning easier; Advantage: no sticking of the rice. Make sure to secure the foil securely, as slipping foil can deform the roll.
Prepare bowl of vinegar water
Prepare a bowl of lukewarm water and some rice vinegar (e.g. one tablespoon per 250 ml). Dip your fingers or a damp cloth in between to prevent the rice from sticking. Important: Change the water regularly to avoid cross-contamination.
Rice vinegar reduces sticking and adds light seasoning, but does not replace disinfection. You should keep the bowl separate from raw fish ingredients and change hands and cloths clean. Danger: Vinegar does not kill all germs, so pay attention to temperature control and strict hygiene.
Top nori sheet with rice
Place the nori sheet on the bamboo mat with the rough side facing up . Make sure that the shiny side is facing down so that the rollers close better later.
Spread the sushi rice evenly, leaving about 2 cm free at the top. Avoid too much rice, as this will make rolling more difficult and can tear the nori sheets.
Rough side to top
The rough side absorbs the rice better and provides a firm hold. Check the side by bending the sheet slightly: the matte side is the rough one.
If you mix up the sides, the roller will adhere poorly and come loose when you cut. Important: always shiny side outwards.
Distribute rice evenly
Lightly moisten your hands so that the rice does not stick, and spread it evenly in a thin layer with gentle pressure. Aim for a thickness of about 0.5-1 cm.
Leave a border at the top and press only lightly so that the nori does not get soggy. Positive: an even layer ensures clean windows.
If you spread unevenly, the roll will be difficult to shape; but don’t press too hard, otherwise the rice will be mushy. Danger: pressing too hard destroys the texture.
Place the filling correctly
Place the nori side with rice in front of you and place the ingredients in the middle of the lower third so that the roll forms evenly when rolled up. Make sure that moist ingredients such as cucumber or fish are well drained, as too much liquid will make the roll mushy. You can find more tips here: How to make Sushi- 10 easy steps.
Spread the ingredients evenly in a thin line so that you get clean cuts and a stable structure when rolling. If you work cleanly, you will achieve perfect enjoyment and avoid the roll from bursting open during cutting.
In the middle of the lower third
You place the filling so that about a third of the nori sheet remains free at the bottom; this is the area you turn around first when rolling. This position ensures even pressure when rolling up and prevents the ingredients from spilling out to the side.
Don’t overfill
You only use a thin layer of filling, otherwise the roll can pop open when you cut it. Rolls that are too full are difficult to shape and run the risk of sushi falling apart or looking unclean.
More information: Limit yourself to the core elements – rice, fish and a vegetable – and avoid too many sauces; so the roll remains stable and the taste balanced. Less is often better here.
Forming the sushi roll
Place the nori sheet on the bamboo mat and spread the rice evenly, leaving a free strip at the top. Place the filling in the middle and start lifting the mat so that you guide the roll cleanly; make sure that the filling is even.
Roll tightly but controlled until the seam is at the bottom. Pressing too hard will squeeze out the filling, while firm, even pressure will result in a stable, even roll.
Roll with light pressure
Perform the roll with your fingers and apply only light pressure when squeezing for the first time so that the rice combines without crushing the ingredients. Tuck in the filling with your thumbs before rolling on.
Repeat rolling once or twice to firm the shape. Avoid hasty movements; does not squeeze ensures the appearance and texture.
Fix the end with water
Moisten the free nori strip sparingly with a little water or rice vinegar to seal the seam. Just a breath of water is enough, too much makes the nori mushy.
Press the seam briefly and place the roll with the seam facing down so that it cools and settles. This results in clean, stable slices when cut.
For fixation, it is best to dab with a damp finger or a slightly damp brush; one drop is enough. Wait 1-2 minutes before cutting so that the seam adheres completely and the nori does not tear.
Cut Clean Sushi Pieces
When cutting, you decide on appearance and bite. Work quickly with clean hands and a damp surface so that you get clean, uncrushed pieces.
Pay strict attention to hygiene and avoid cross-contamination; a sharp knife reduces pressure – but be careful, because a sharp knife is dangerous.
Use a sharp, wet knife
Wet the blade with water or a damp cloth before each cut. A sharp, wet knife glides through rice and fish without tearing.
Cut in smooth pull-in or pull-through motions instead of sawing; keep your board stable and pay attention to the risk of slipping to avoid cuts.
Divide into bite-sized pieces
Divide rolls into even pieces so that each bite is easy to eat ; 6-8 pieces per maki are common. Wet the blade and wipe it down between cuts.
For nigiri, you first form the rice bed, put the fish on top and cut so that the portion remains stable on the rice bed; avoid discs that are too large.
Check when cutting on bones and remove protrusions; dispose of leftovers hygienically. Uniform pieces improve presentation and taste – precision pays off.
Make your own sushi – 10 simple steps for perfect enjoyment
You’ll learn how to prepare high-quality sushi at home in clear steps: wash and season rice properly, choose the right fish, use a sharp knife, prepare nori sheets, shape rolls evenly, observe cutting techniques, maintain hygiene and refrigeration, and combine creative fillings. These 10 simple steps will give you control over taste, texture, and presentation.
With precise technique and fresh ingredients, you can achieve consistently perfect results; practice regularly, pay attention to proportions and hygiene, and you’ll soon be serving sushi that impresses guests and guarantees enjoyment.
FAQ
Q: What basic ingredients and tools do I need for “Make your own sushi – 10 simple steps for perfect enjoyment”?
A: Basic ingredients: sushi rice (short-grain), rice vinegar, sugar, salt, nori leaves, fresh fish (sashimi quality) or alternatives (salmon, tuna, shrimp, tofu, vegetables), soy sauce, wasabi, pickled ginger. Tools: rice cooker or dense pot, hangiri or large bowl, wooden spatula, bamboo mat (makisu), sharp knife, damp cloth. These items cover the 10 steps from washing rice to serving.
Q: How do I prepare perfect sushi rice (washing, cooking, seasoning)?
A: Wash rice thoroughly under cold water until the water runs clear; Soak for 30 minutes. Cooking ratio rice:water about 1:1.1-1.2 (depending on the rice cooker). After cooking, let it rest for 10-15 minutes. Sushi vinegar mix (per ~300 g uncooked rice): approx. 90-120 ml rice vinegar, 2-3 tbsp sugar, 1-2 tsp salt (heat until sugar dissolves). Place the rice in a shallow bowl, add the vinegar mixture evenly, carefully mix in with a wooden spatula and fan the fan air so that the rice is shiny and sticky but not mushy.
Q: How do I roll maki and shape nigiri correctly (technique step by step)?
A: Maki: Place nori on top of makisu with shiny side down, apply a thin layer of rice (about 70-90 g), leave 1 cm of edge free, place topping in the middle, roll taut with mat without squeezing. Cut into 6-8 pieces with a damp, sharp knife. Uramaki: rice on the outside, nori on the inside (spread the rice on foil, turn the nori over). Nigiri: small portion of rice (hand moisture), gently shape, press on topping, optionally combine with wasabi. Exercise ensures uniformity and a firm but airy structure.
Q: How do I choose and handle fish safely for raw sushi? Are there alternatives?
A: Only use “sashimi/sushi quality” fish from a trusted retailer. To reduce parasites, deep-freeze according to regional recommendations (e.g. −20 °C for at least 24-72 hours, depending on the regulations). Pay attention to freshness: clear smell, firm texture, bright colour. If you are unsure, cook alternatives: briefly fried salmon, shrimp, pickled octopus, or vegetarian variants with avocado, cucumber, baked tofu or tempura vegetables.
Q: How and how long can I store homemade sushi and what tips improve taste and presentation?
A: It is best to serve fresh immediately. Sushi (with raw fish) can be kept chilled for a maximum of 24 hours, nori becomes soft. Nigiri/maki without raw fish can also be refrigerated briefly, but lose texture. Presentation tips: cut even pieces, clean with a damp cloth, serve soy/wasabi/ginger separately, fresh herbs or thin vegetable strips for colour, sesame seeds or fried onions sparingly as a garnish. For perfect results: Temper the rice correctly (not too hot), do not overload the toppings, moisten the knife before each cut.